
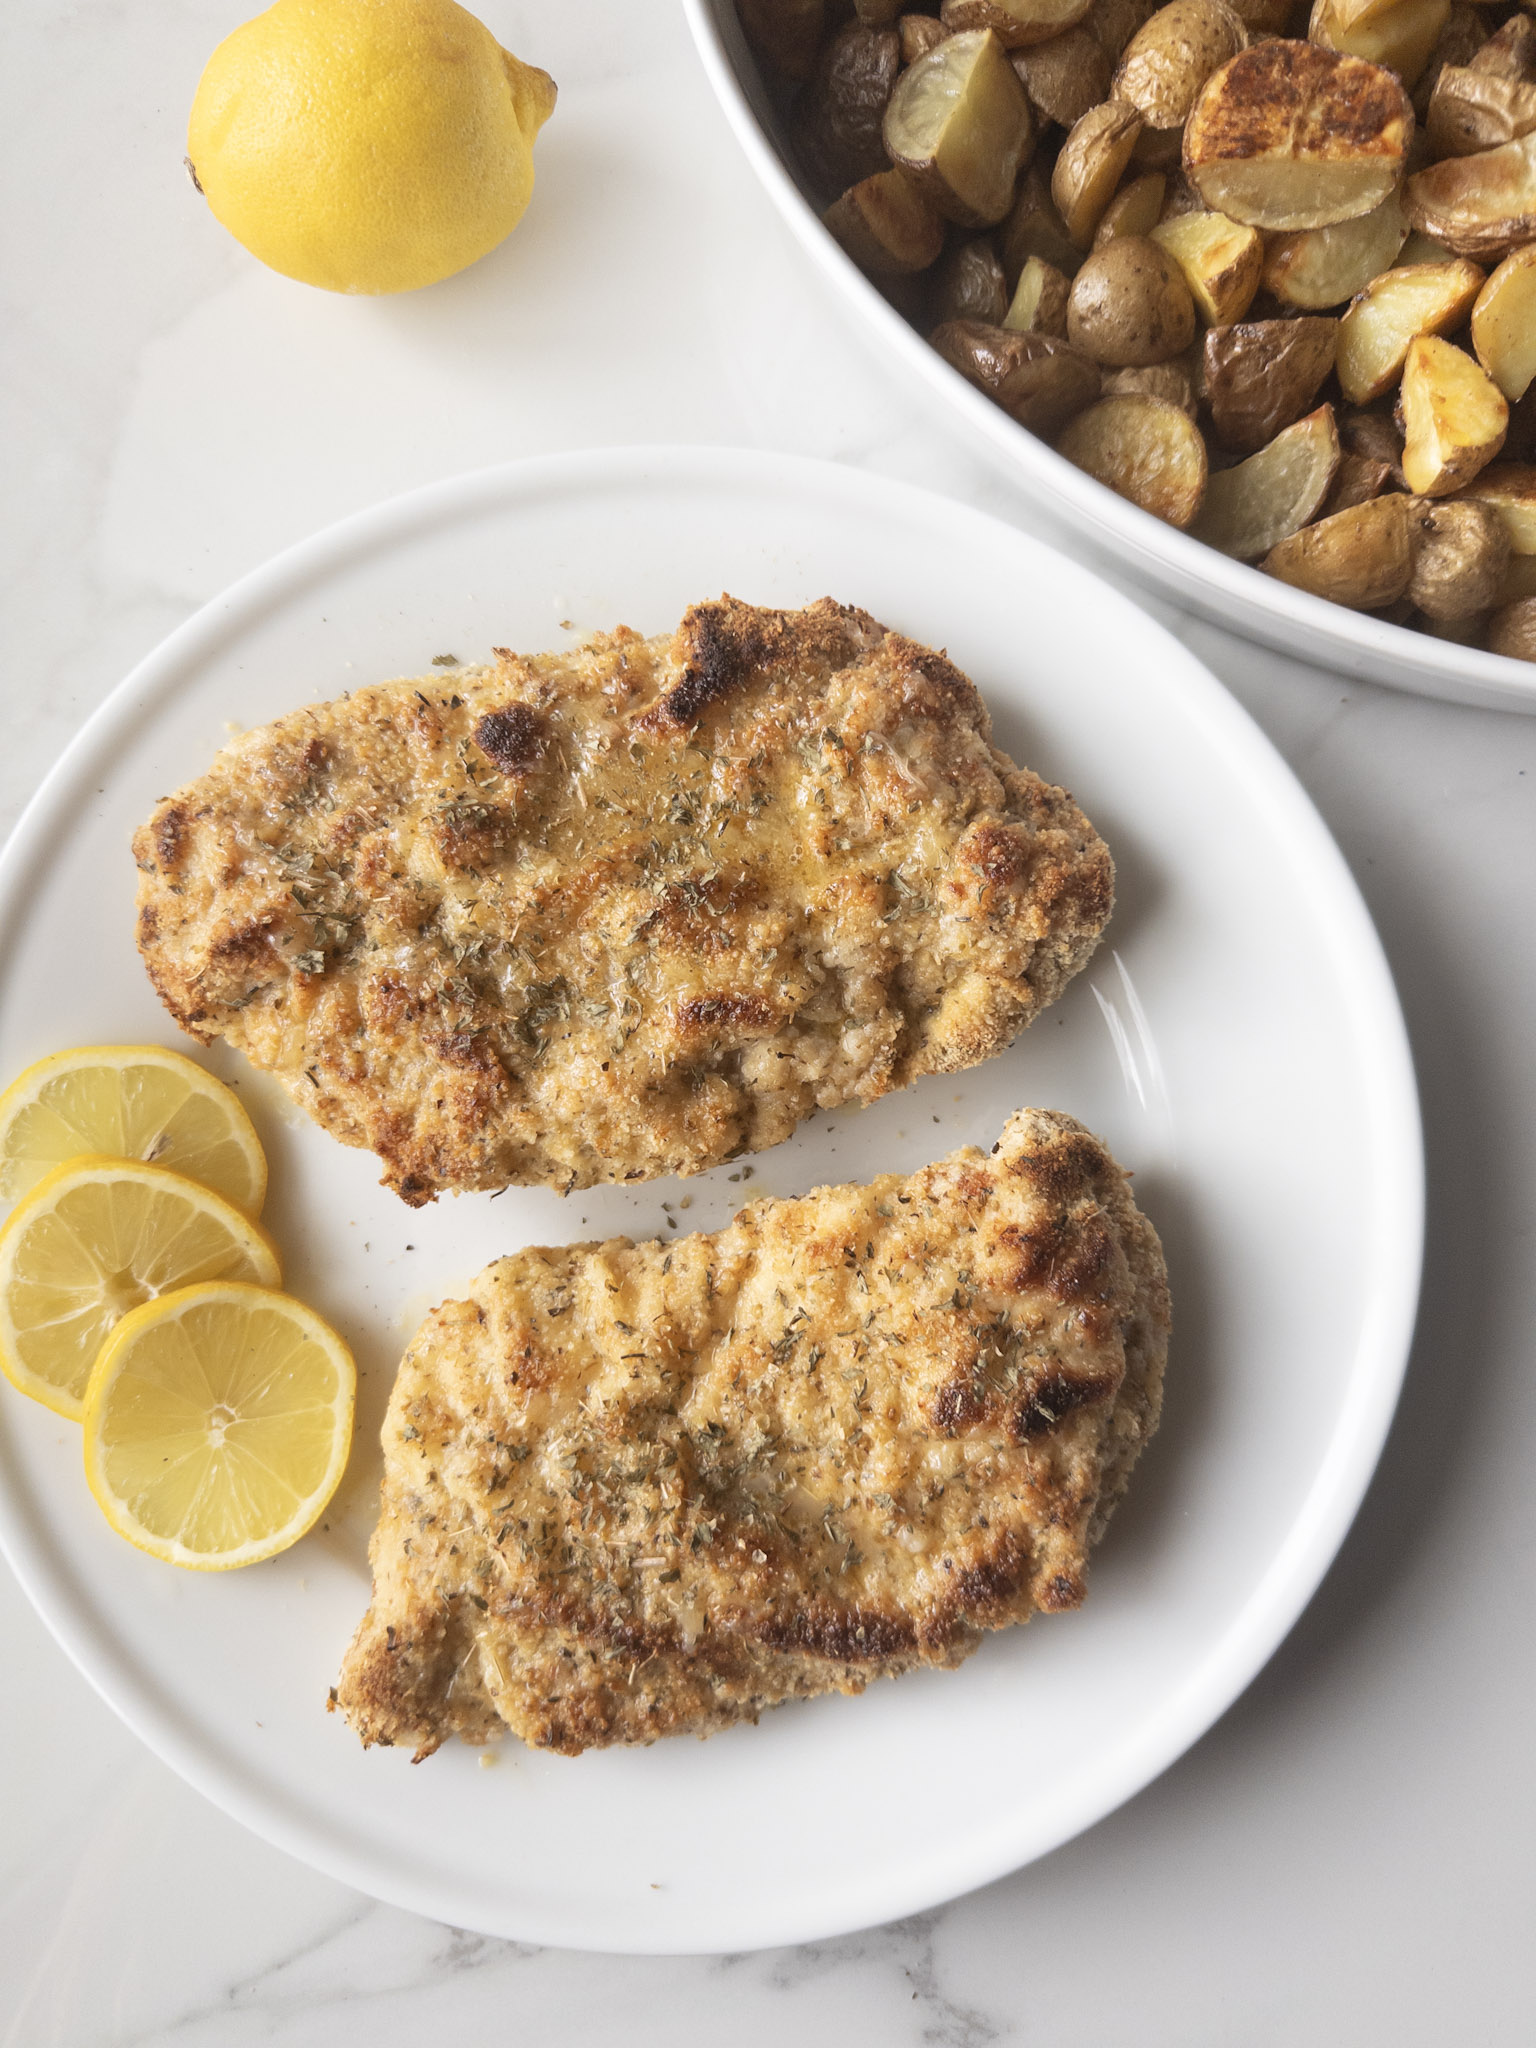
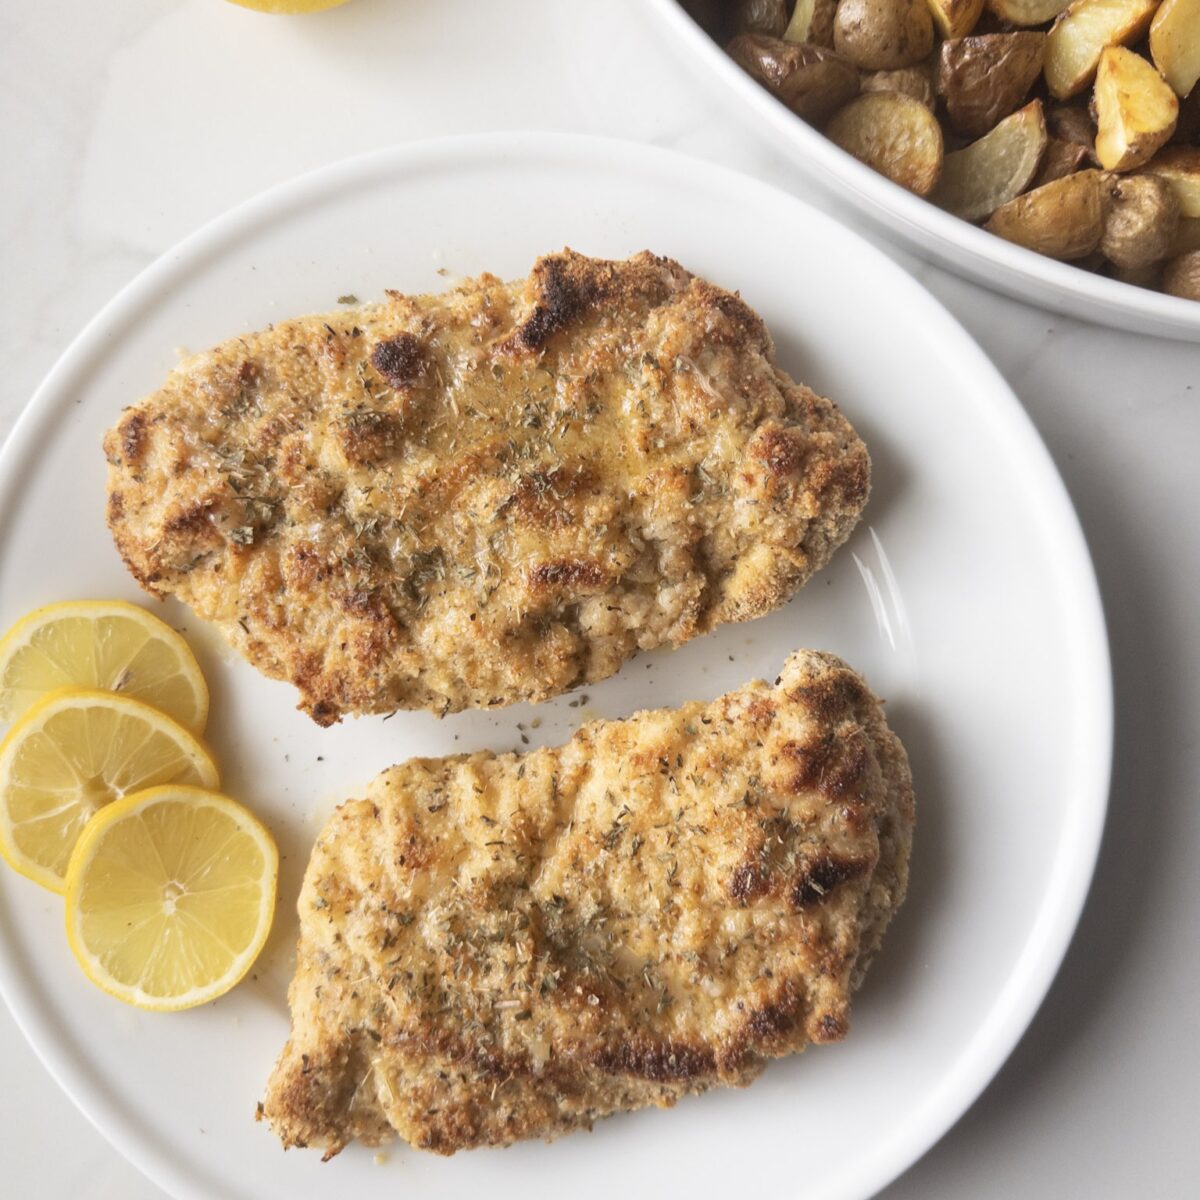
Gluten-free chicken piccata is one of those meals that transforms plain chicken into something special— something that works just as well for a weeknight dinner as it does for a special occasion. This recipe breads the chicken in gluten-free flour, egg wash, and Italian seasoned almond flour, then bakes and broils it to a crispy, golden finish. No pan-frying means less handling, so that crispy breading stays perfectly intact. Give it a try this week and see how easy it is to elevate your chicken dinners!
My introduction to chicken piccata was through Ina Garten's recipe, and it was love at first bite. Her recipe is legendary—but when I tried to recreate that perfectly breaded chicken in lemon sauce, I kept struggling to get the golden coating to stay intact all the way to the dinner plate.
When my family developed gluten sensitivities, I was determined to fall in love with this dish all over again. Baking the chicken turned out to be the answer. It cooks evenly, requires far less handling than pan-frying, and a quick broil at the end delivers that perfectly crispy exterior. Chef's kiss!
With the addition of a delicate lemon sauce and fresh parsley, this dish comes together beautifully. Ever wonder what to serve with chicken piccata? Roasted baby potatoes are a perfect match—they bake at the same temperature, so they can roast right alongside the chicken for an easy, hands-off side.
Ready to elevate your chicken dinner? This gluten-free chicken piccata is exactly what your weeknight rotation or next special occasion needs!
Ingredients

- Chicken – The star of this recipe and a perfect high-protein option for a main dish.
- Gluten-Free Flour – Acts as a barrier that seals in moisture, keeping the chicken juicy.
- Egg – The binder that helps the breading adhere to the chicken.
- Almond Flour – Creates a perfectly crispy, golden exterior. Combined with Italian seasoning, it adds great flavor too.
- Butter – Adds richness to the lemon sauce.
- Lemon Juice – The signature flavor of chicken piccata.
- Apple Cider Vinegar – Adds acidity and depth to the sauce.
See recipe card for quantities.
Instructions
Step 1: Preheat & Prep the Chicken
Preheat the oven to 400°F and place a wire rack on a baking sheet—this keeps the bottom of the chicken from getting soggy as it bakes.
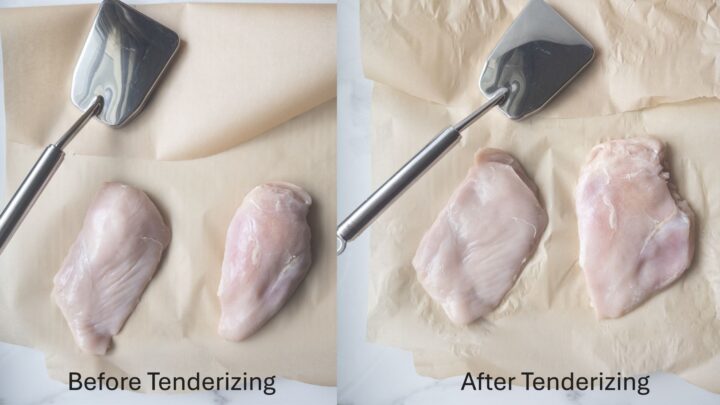
Using the flat side of a meat tenderizer, pound the chicken to an even thickness (I like to do this between two sheets of parchment paper). Pat dry thoroughly with a paper towel. This step is essential for keeping the breading intact!
Step 2: Set Up Your Breading Station
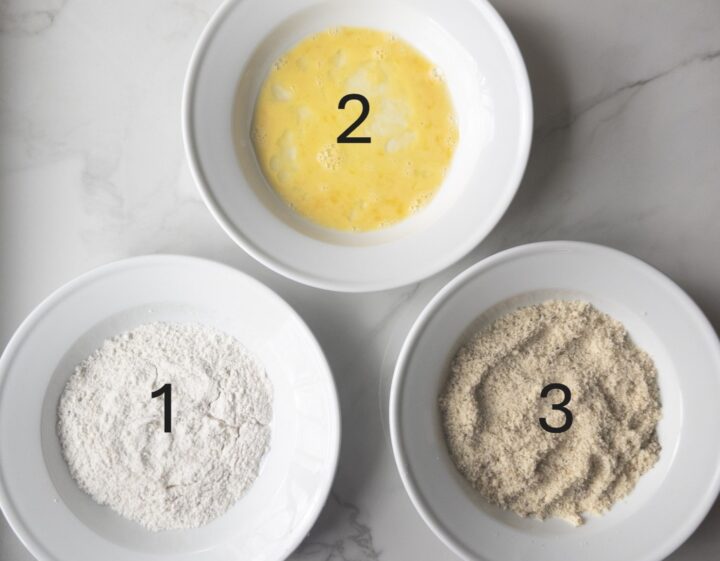
Grab 3 shallow bowls—one for the gluten-free flour, 1 teaspoon salt, and pepper; one for the egg and water; and one for the almond flour and Italian seasoning. Whisk each mixture to combine.
Step 3: Bread the Chicken
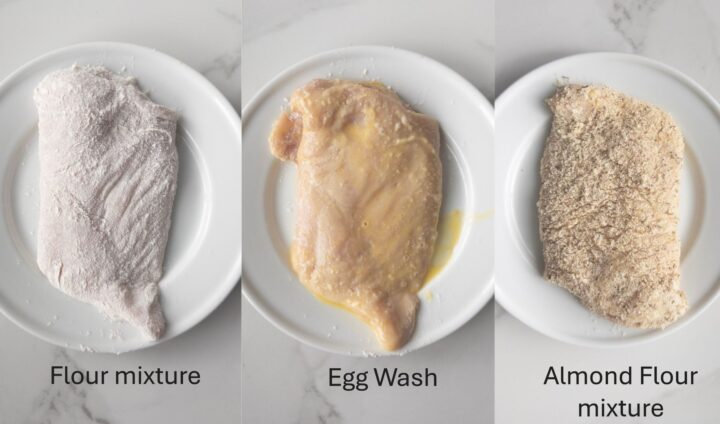
Coat each chicken breast in the flour mixture, then the egg mixture, then the almond flour mixture. Place on the wire rack and repeat with the remaining chicken.
Step 4: Spray & Bake
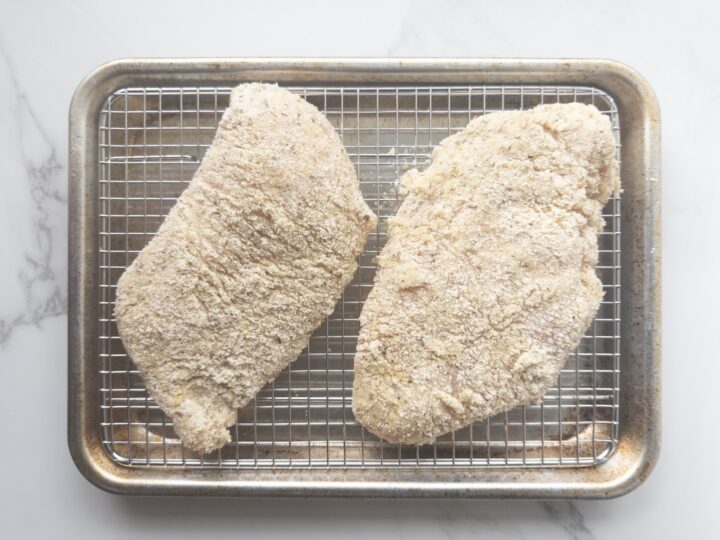
Lightly spray the breaded chicken with oil and bake for 25 minutes, or until the chicken reaches an internal temperature of 165°F
Step 5: Make the Lemon Sauce
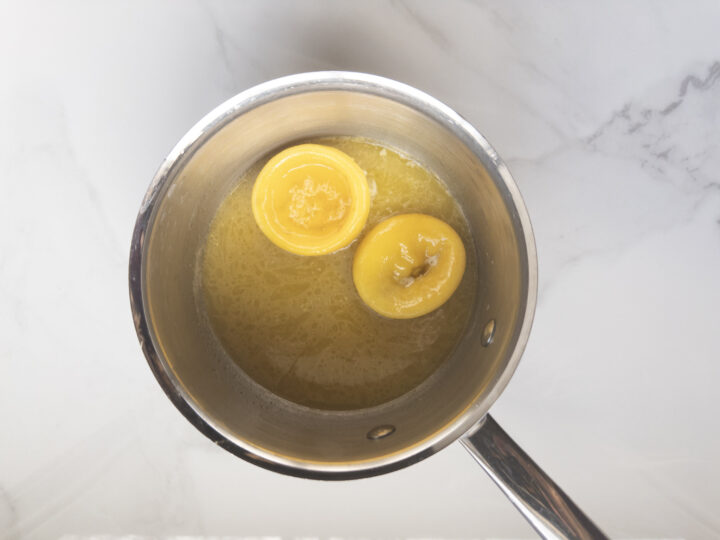
While the chicken bakes, combine the butter, lemon juice, lemon halves, apple cider vinegar, and ½ teaspoon salt in a small saucepan. Bring to a simmer and cook until the chicken is ready.
Step 6: Broil
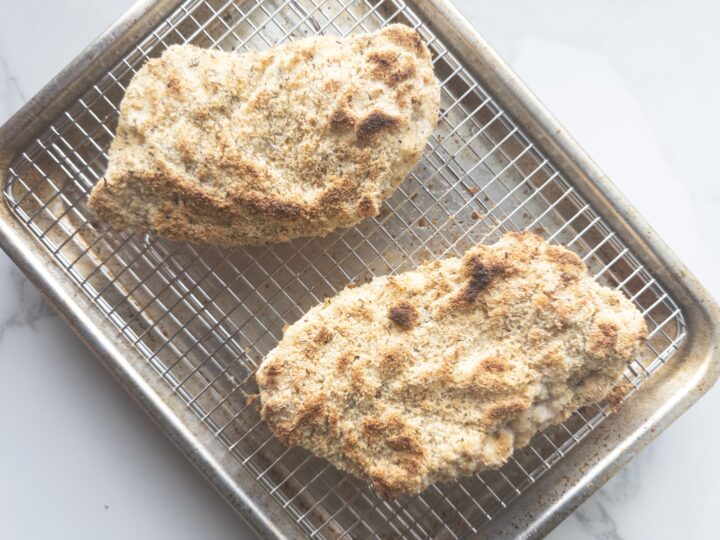
Once the chicken is finished baking, switch the oven to broil for about 2 minutes or until the chicken is golden and crispy.
Step 7: Plate & Serve

Pour the lemon sauce over the chicken, top with fresh parsley, and serve warm.
Hint: Keep a close eye on the chicken while it broils! Two minutes goes fast, and depending on how hot your oven runs, it may brown sooner than you expect.
Substitutions
Not gluten-free? Feel free to use all-purpose or fresh milled flour and seasoned breadcrumbs for breading.
White wine vinegar will also work in place of the apple cider vinegar.
Equipment
- Meat tenderizer
- Baking sheet with wire rack
- Sauce pan
Storage
This dish is best served fresh out of the oven—the breading holds up best right after baking. Leftovers will keep in the fridge for 2–3 days. To reheat, use the oven instead of a microwave to help the breading crisp back up.
Top Tip
Pat the chicken as dry as possible before breading—this is the key to making sure the coating stays on and crisps up perfectly.

FAQ
No problem! This recipe works beautifully with non-gluten-free substitutes. Simply swap the gluten-free flour for all-purpose or fresh-milled flour in the first breading stage, and replace the almond flour with seasoned breadcrumbs for the final coat.
This is one step I'd recommend not prepping ahead of time. If the almond flour sits on the egg coating for too long, it won't crisp up properly in the oven. That said, you can get a head start by pounding the chicken ahead of time—that way you can go straight to breading when you're ready to cook.
Absolutely! Capers are a traditional chicken piccata ingredient—I simply left them out to keep the recipe practical and pantry-friendly. If you have them on hand, they make a wonderful addition.
To let this dish shine, keep the sides simple. Roasted or steamed vegetables are a natural pairing—think baby potatoes, asparagus, or broccoli.
Recommended
Looking for other recipes like this? Try these:

Gluten-Free Chicken Piccata
Ingredients
Method
- Preheat the oven to 400°F and place a wire rack on a baking sheet—this keeps the bottom of the chicken from getting soggy as it bakes.
- Using the flat side of a meat tenderizer, pound the chicken to an even thickness (I like to do this between two sheets of parchment paper). Pat dry thoroughly with a paper towel. This step is essential for keeping the breading intact!
- Grab 3 shallow bowls—one for the gluten-free flour, 1 teaspoon salt, and pepper; one for the egg and water; and one for the almond flour and Italian seasoning. Whisk each mixture to combine.
- Coat each chicken breast in the flour mixture, then the egg mixture, then the almond flour mixture. Place on the wire rack and repeat with the remaining chicken.
- Lightly spray the breaded chicken with oil and bake for 25 minutes, or until the chicken reaches an internal temperature of 165°F
- While the chicken bakes, combine the butter, lemon juice, lemon halves, apple cider vinegar, and ½ teaspoon salt in a small saucepan. Bring to a simmer and cook until the chicken is ready.
- Once the chicken is finished baking, switch the oven to broil for about 2 minutes or until the chicken is golden and crispy.
- Pour the lemon sauce over the chicken, top with fresh parsley, and serve warm.

Comments
No Comments