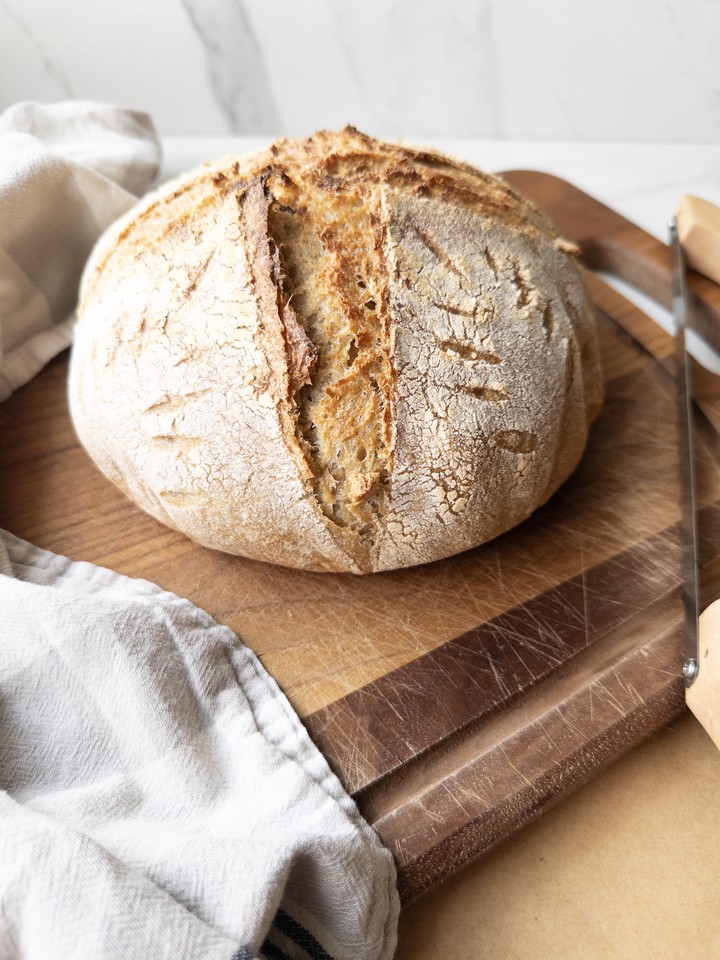
If you loved baking sourdough and your loaves have come out flat as a pancake since you switched to fresh milled flour, this recipe is for you! This easy whole wheat sourdough with fresh milled flour bakes up tall, round, and beautiful. Just a few simple adjustments for fresh milled flour, and you’ll be baking sourdough loaves you love again.
Why You'll Love This Easy Whole Wheat Sourdough Bread with Fresh Milled Flour
- Rises tall, not flat. A higher hydration, the right wheat, and a cold proof give you a loaf with real height.
- Familiar steps, small changes. It's the sourdough process you already know, with a few adjustments for how fresh milled flour behaves.
- Fits around family life. Mix it in the morning, shape it in the afternoon, and let the fridge handle the overnight proof.
- Brings back the fun of sourdough. If fresh milled flour sourdough has frustrated you before, this is the loaf that wins you back.
I baked sourdough for about two years before our family stepped away from gluten. When I found fresh milled flour, I couldn't wait to bake it again. But my excitement quickly turned to disappointment when my first loaf came out flat as a pancake. After a few more tries, my starter went to the back of the fridge for close to a year.
When I came back to it with fresh eyes, I figured out that fresh milled flour simply doesn't behave like store-bought flour, and that a few small changes fix nearly everything. Now it's one of my favorite things to bake and keep on the counter for my family.
If you've been there too, missing the sourdough you used to love to bake and feeling discouraged by flat loaves, this is your recipe. You'll learn what works best when using fresh milled flour and have confidence in baking a beautiful, nutritious fresh milled sourdough loaf.
Jump to:
Tips for Success with Fresh Milled Flour Sourdough
These are the things I never had to think about with all-purpose flour, and the things I watch most closely now when baking whole wheat sourdough bread.
- Use high hydration and a hard wheat. This is my biggest tip. Fresh milled flour is thirsty because the bran soaks up so much water, so it needs close to 90% hydration to get a soft, open crumb. This recipe lands right around there once you count the water in the starter. Pair it with hard white or hard red wheat. Their stronger gluten traps gas and holds the loaf up, while softer grains like Kamut or spelt tend to spread.
- Autolyse with just flour and warm water. Mix only the flour and warm water first, and let them rest for 30 minutes to an hour before adding the starter and salt. This gives the bran and germ time to soften and the flour time to fully absorb the water, so the dough comes together smooth instead of gritty and stiff. Adding the starter and salt later lets the gluten start developing first.
- Get your shaping right. A tight, well-shaped loaf rises up instead of out. My four B's of shaping, below, are the simple routine that changed my rise. I also bake this as a round loaf scored with an X. If you're chasing the big, tall rise you used to get with all-purpose flour, that combination helps the loaf grow up through the middle instead of spreading.
- Stop the rise at 60–70%, not doubled. This is one of the biggest differences from all-purpose sourdough. Fresh milled dough ferments faster and can't hold as much gas, so waiting for it to double is what flattens most loaves. Go by a domed top and a spring back when you gently poke it, not the clock.
- Keep it warm. Always use warm water with fresh milled flour, and let the dough rise somewhere a little warm. I get a noticeably better rise when it's not sitting in a cool kitchen.
- Cold proof overnight. Because the dough is so hydrated, a night in the fridge firms it up so it holds its shape, scores cleanly, and bakes into a tall loaf.
- Bake in a very hot Dutch oven. A fully preheated Dutch oven gives the loaf a strong burst of heat and steam for the best oven spring. If you like, a thin layer of uncooked rice under the parchment keeps the bottom from getting too dark at such a high temperature.
The Four B's of Shaping
A good shaping session right before the dough goes into the banneton (or a towel-lined bowl) is one of the biggest factors in how tall your loaf bakes. Fresh milled dough is soft and relaxed because of its high hydration, so it needs help building the structure that holds it up. These four steps make it simple.
- Braid. Turn the dough out onto a lightly floured surface. Gently pull one side out and fold it over the center, then the other side, working your way down the dough so it looks like a fishtail braid. This builds strength across the whole loaf.
- Burrito. Starting from the bottom edge closest to you, roll the dough up and away from you snugly, like a well-wrapped burrito. A tight roll gives the loaf a smooth, taut outer skin.
- Build tension. With the seam underneath, cup your hands around the dough and drag it toward you a few times, turning it as you go. The surface should tighten up and feel smooth, like a balloon. That tension is what makes the loaf rise up instead of out.
- Banneton. Place the dough seam side up in a floured banneton, cover it, and refrigerate it overnight. The basket holds the shape while it proofs. No banneton? A bowl lined with a lightly floured kitchen towel works just as well. Just fold the towel over the top so no dough is exposed in the fridge.
Things I Don't Stress About
If you learned sourdough with all-purpose flour, you probably have a few rules you follow closely. These are the ones I've let go of with fresh milled flour.
- Perfect timing. Your day doesn't have to run on the dough's schedule, and a little early or late is fine. Just stick it in the fridge and pick it back up where you left off when you can.
- A starter at its exact peak. Use a fed starter that's had a little time to rise. If it's just about ready, or even a little past its peak, it'll still work.
- The jiggle or a big bulk rise. Fresh milled dough won't jiggle like white flour dough, and it won't rise as high during bulk. Go by touch instead: wet your finger and give the dough a gentle poke. If it springs back, it's ready.
- How many stretch and folds. Four sets is ideal, but if the day gets busy, one or two will still get you a good loaf.
- Having a banneton. A banneton is nice, but you don't need one. A bowl lined with a lightly floured kitchen towel holds the shape just as well during the overnight proof.
- Skipping the overnight proof. Short on time? After shaping, let the loaf sit on the counter for about an hour, then put it in the freezer while the oven preheats. The chill helps it hold its shape and score cleanly.
Ingredients
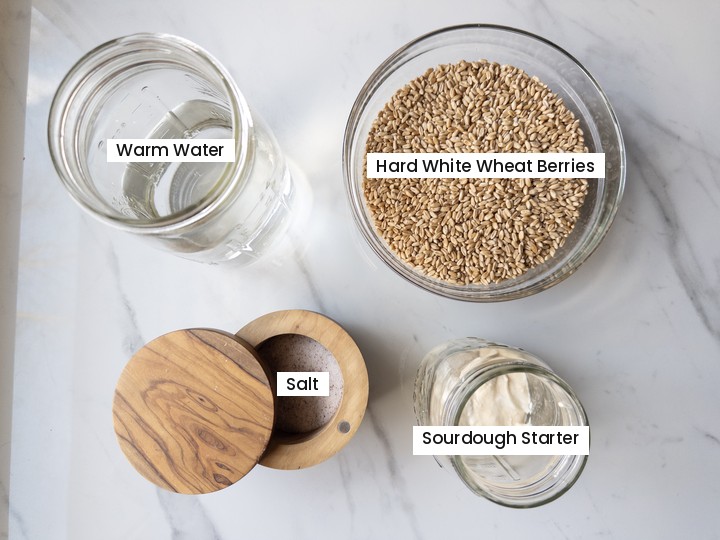
- Hard white wheat berries — Milled fresh, with strong gluten for height and a mild, slightly sweet flavor. Hard red would also be a good choice for this loaf.
- Warm water — Softens the bran and gives the loaf a soft, open crumb. Warm water also gets fermentation going. I like to use water around 110°F.
- Active sourdough starter — The leavening that gives the loaf its rise and that classic sourdough tang.
- Salt — Adds flavor and strengthens the gluten.
- Uncooked rice (optional) — A thin layer in the bottom of the Dutch oven keeps the bottom crust from getting too dark.
See recipe card for quantities.
Instructions
Step 1: Feed Your Starter
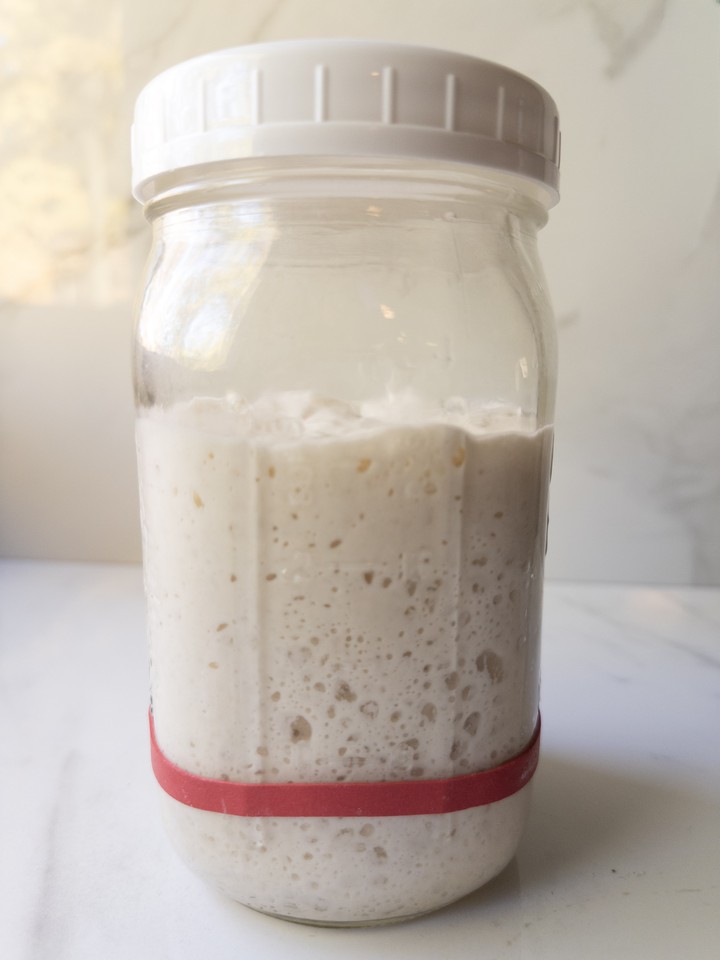
Feed your starter a few hours before you plan to mix your dough, and let it rise on the counter. It should be bubbly and doubled in size by the time it goes into the dough.
Step 2: Mill the Flour and Mix with Warm Water
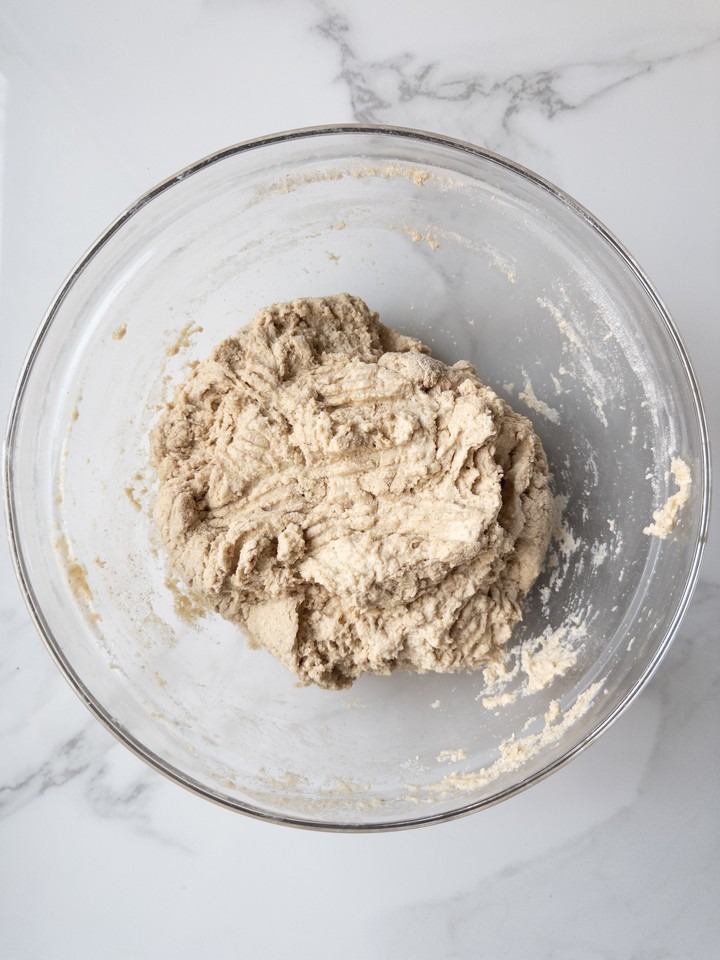
Mill your berries into flour with your grain mill. Mix the fresh milled flour with 400 g of warm water (around 110°F) until no dry flour remains, holding back the remaining 25 g of water for later. Cover and let it rest for 30 minutes to an hour. This rest, called an autolyse, softens the bran and germ.
Step 3: Add the Starter, Salt, and Remaining Water
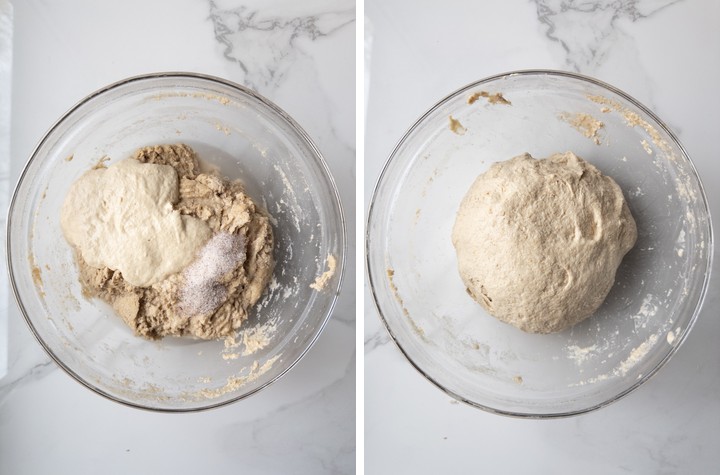
Add the active starter, the salt, and the remaining 25 g of warm water to the rested dough. Work everything in with wet hands, folding the dough onto itself several times until it feels well mixed. Gently form it into a loose ball, cover, and let it rest for 30 minutes before your first set of stretch and folds.
Step 4: Stretch and Fold
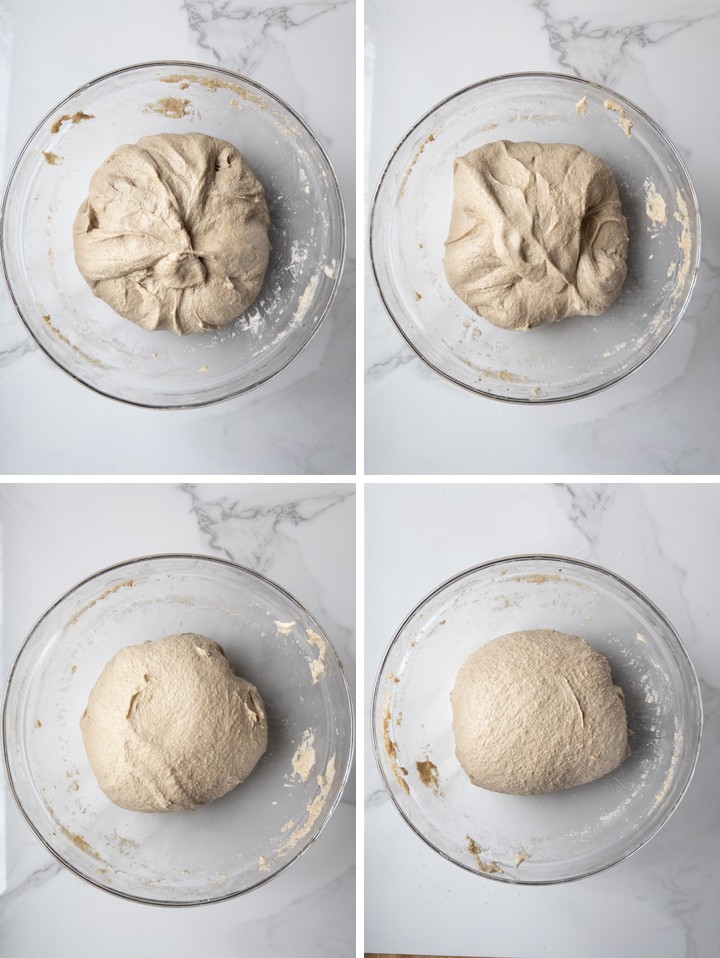
After the 30-minute rest, do four sets of folds, 30 minutes apart. For the first two sets, use stretch and folds: with wet hands, grab one side of the dough, stretch it up, and fold it over the center, then turn the bowl and repeat on all four sides. For the last two sets, switch to coil folds: lift the dough from the middle so it folds under itself, turn the bowl, and repeat.
Tip: I like coil folds for the last two sets because they're gentler, but if you're more comfortable with stretch and folds, you can do all four sets as stretch and folds instead.
Step 5: Let It Rise
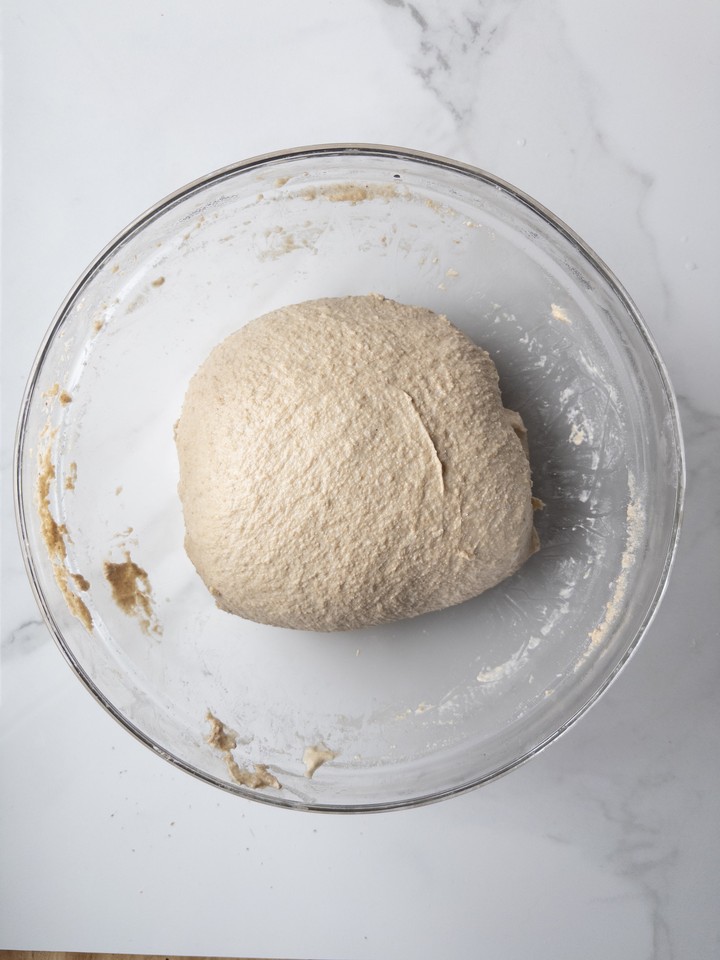
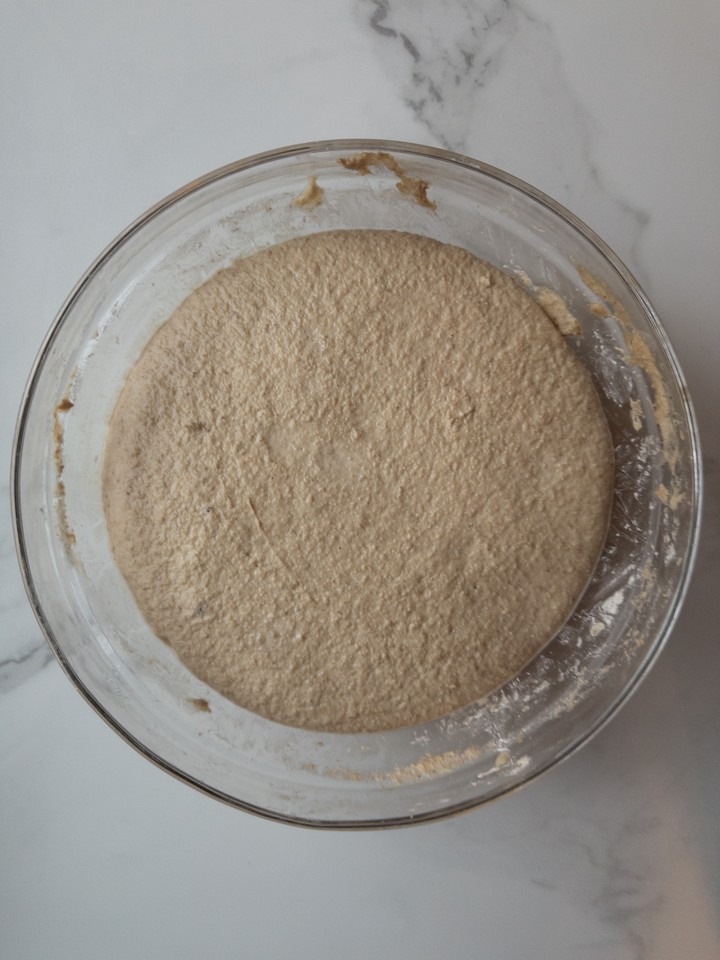
Let the dough rise until it's about 60–70% larger, not doubled. Fresh milled dough ferments faster and can't hold as much gas as white flour dough, so stopping short of doubled keeps it from collapsing. Watch the dough, not the clock. In my kitchen, it takes about 5 to 5½ hours from when the starter goes in, and longer if your kitchen is cool. It's ready when it has a domed top and bubbles on the surface and along the sides, and a gentle poke with a wet finger springs back. Don't wait for the jiggle you may be used to from white flour sourdough. The bran makes fresh milled dough denser, so it won't wobble much even when it's ready.
Tip: After my last coil fold, I put a piece of painter's tape on the side of the bowl right at the top of the dough. It makes it easy to see how much the dough has risen.
Step 6: Shape with the Four B's
Gently turn the dough out onto a lightly floured surface. I like using the four B's when shaping my dough: braid, burrito, build tension, and banneton. You can find them, along with a video of how I shape my loaves, here. Place the shaped dough seam side up in a floured banneton. If you don't have a banneton, use a bowl with a lightly floured kitchen towel draped in it.
Step 7: Cold Proof Overnight
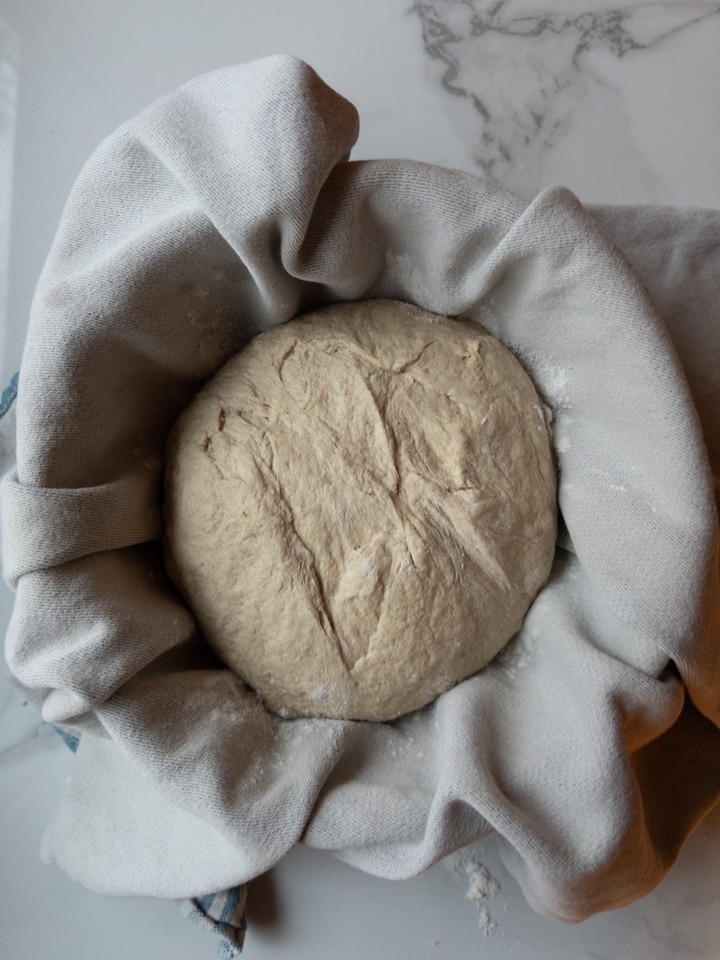
Cover the banneton or bowl (if I'm using a bowl with a towel, I just fold the towel over the dough so that no dough is exposed in the fridge) and put it straight into the fridge overnight, with no counter rest needed. The cold firms up the dough so it holds its shape and scores cleanly in the morning.
Step 8: Preheat the Oven
In the morning, place your cast iron Dutch oven in the oven and preheat to 500°F for about 40 minutes.
Step 9: Shape Gently and Score
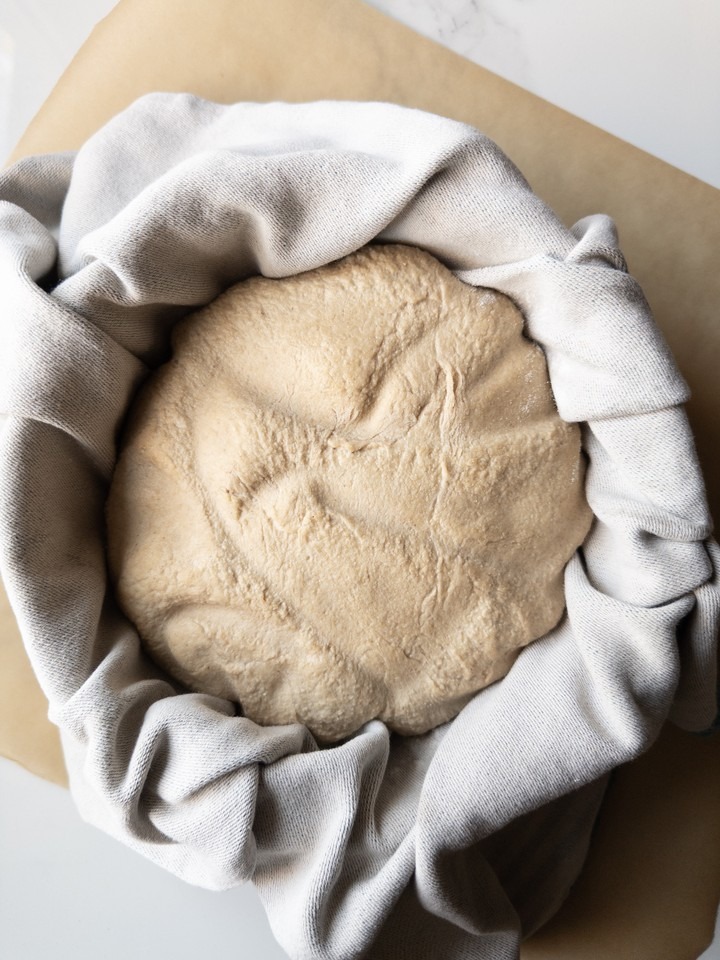
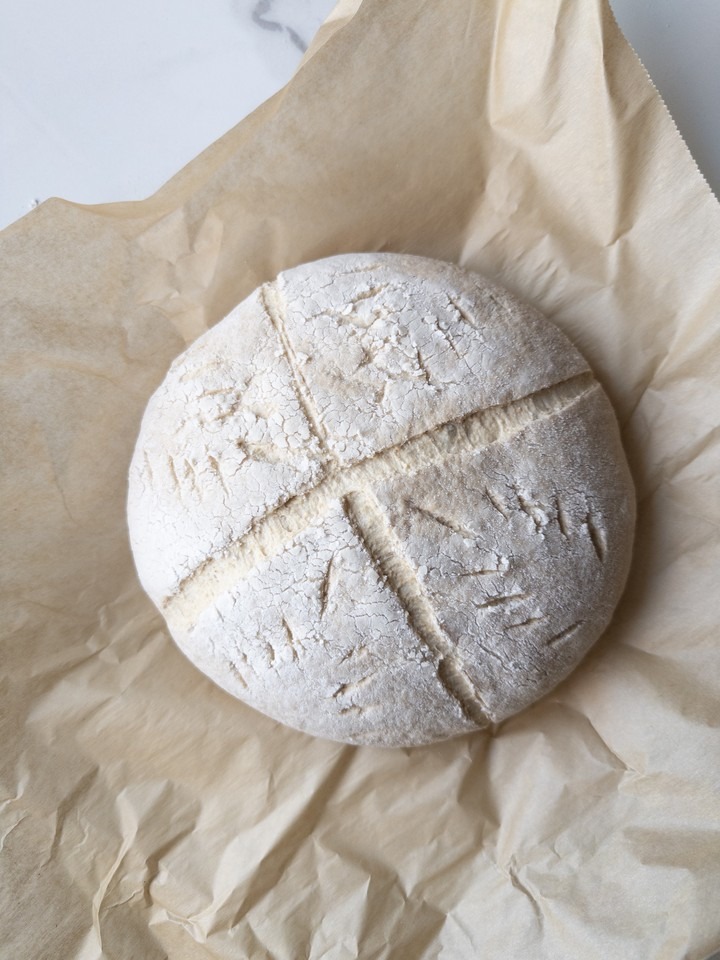
Right before baking, take the dough out of the fridge and turn it out onto a piece of parchment paper. Gently round it into a circle with a light tension build, just enough to tighten the surface without knocking out the air. Score an X across the top. A round loaf with an X score gives you the most height: the compact shape supports itself as it bakes, and the crossing cuts let the center lift straight up instead of the loaf pushing out to one side.
Step 10: Bake Covered
If you're using rice, carefully sprinkle a thin layer of it over the bottom of the hot Dutch oven. It acts as a buffer between the hot cast iron and the loaf, keeping the bottom from getting too dark or hard before the rest of the loaf is baked. Lift the loaf by its parchment and set it in the Dutch oven, so the dough never touches the rice directly. Cover and bake at 500°F for 20 minutes.
Step 11: Bake Uncovered
Remove the lid, lower the oven to 450°F, and bake about 10–15 minutes more, until the crust is deep golden brown.
Step 12: Cool
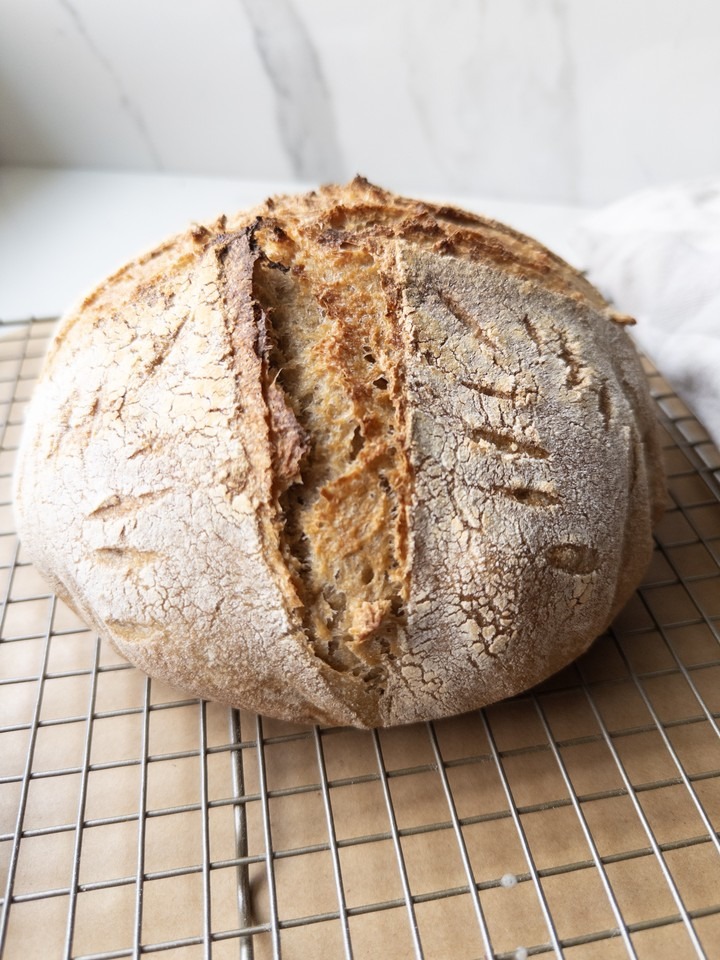
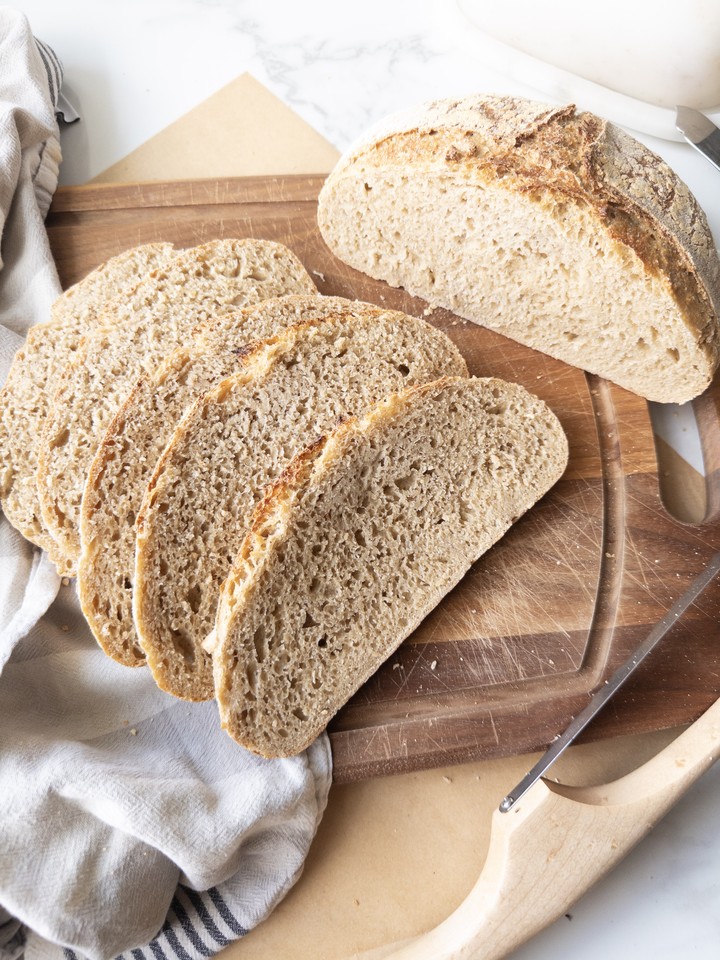
Take the loaf out of the Dutch oven right away so it doesn't keep cooking in the hot pot, and set it on a wire rack. Let it cool for about an hour before slicing. The crumb is still setting as it cools, so cutting in too early can leave it gummy.
Hint: For a more dramatic opening, lift the lid about 7 minutes into the covered bake and re-score the loaf along the lines where you want it to open, then cover it and finish baking.
Equipment
- Grain mill (I have a Wondermill)
- Digital Scale
- Large mixing bowl
- Banneton (or a bowl lined with a kitchen towel)
- Cast iron Dutch oven
- Parchment paper
- Bread lame (or a razor blade)
- Wire rack
Storage
- Room temperature: Store the loaf cut side down on a cutting board, or in a bread bag, for 2–3 days.
- Freezer: Slice the cooled loaf, freeze it in a freezer bag for up to 3 months, and toast slices straight from frozen.
Top Tip
Keep everything warm. Fresh milled sourdough rises best when it stays cozy, so I always use warm water and let the dough bulk rise somewhere warm. I like to keep it by the stove while I'm cooking, or on top of the oven when I'm baking something else. You can also turn the oven on for a few minutes, shut it off, and let the dough rise in the warm oven. Just don't forget it's in there!
FAQ
You can, but expect a flatter loaf. Fresh milled flour absorbs more water, ferments faster, and has bran that weakens the gluten, so a recipe written for all-purpose flour usually needs more water, a shorter bulk rise, and a flour-and-water rest (autolyse) before the starter goes in. This recipe builds in all of those changes.
Yes. Fresh milled hard white wheat is 100% whole grain, since the bran, germ, and endosperm all stay in the flour. Hard white has a milder, slightly sweeter flavor than the red wheat in most store-bought whole wheat flour. If you want the closest match to your all-purpose loaves, hard white is your best choice.
Yes. Hard red has similar gluten strength, so it rises well, with a heartier, nuttier flavor. A half hard white, half hard red blend works well too.
No. A banneton helps the dough hold its shape during the overnight proof, but a bowl lined with a lightly floured kitchen towel works just as well. Fold the towel over the top so no dough is exposed in the fridge.
In small amounts. Both have weaker gluten than hard wheat, so the dough is softer and harder to shape, and the loaf spreads more. If you add them, keep hard white as the majority and use a little less water.
Most often it's overproofed. Fresh milled flour ferments faster than all-purpose flour, so letting the dough double during bulk usually goes too far. Stop at a 60–70% rise, shape it tightly, and cold-proof overnight.
Yes. After shaping, let the loaf sit on the counter for about an hour, then put it in the freezer while the oven preheats. The chill helps it hold its shape and score cleanly.
It's optional, but at 500°F the bottom of the loaf can get too dark before the rest is baked. A thin layer of uncooked rice under the parchment buffers it from the hot cast iron.
Easy Whole Wheat Sourdough Bread with Fresh Milled Flour
Ingredients
- 500 g hard white wheat berries milled into fresh flour
- 400 g warm water for the autolyse
- 25 g warm water added with the starter and salt
- 100 g active sourdough starter fed and doubled in size
 2 teaspoon salt fine, about 12 g
- ⅓ cup uncooked rice optional, for the bottom of the Dutch oven
Equipment
Method
- Feed your starter a few hours before you plan to mix your dough, and let it rise on the counter until it's bubbly and doubled in size.
- Mill the hard white wheat berries into flour with your grain mill. Mix the fresh milled flour with the warm water until no dry flour remains. Cover and let it rest for 30 minutes to an hour.500 g hard white wheat berries, 400 g warm water
- Add the active starter, the salt, and the remaining warm water to the rested dough. Work everything in with wet hands, folding the dough onto itself several times until it feels well mixed. Form it into a loose ball, cover, and let it rest for 30 minutes.100 g active sourdough starter, 2 tsp salt, 25 g warm water
- Do four sets of folds, 30 minutes apart: two sets of stretch and folds, then two sets of gentler coil folds. If you prefer, you can do all four sets as stretch and folds instead.
- Let the dough rise until it's increased about 60–70%, not doubled. This took me about 5 to 5½ hours from when I added the starter.
- Shape the dough and place it seam side up in a floured banneton or a bowl lined with a lightly floured kitchen towel.Looking for a shaping method? Check out the post above for a video of how I shape my loaves.
- Cover and refrigerate overnight.
- In the morning, place your cast iron Dutch oven in the oven and preheat to 500°F for about 40 minutes.
- Take the dough out of the fridge, turn it out onto a piece of parchment paper, and gently round it with a light tension build. Score an X across the top.
- Optional: sprinkle the rice over the bottom of the hot Dutch oven to keep the bottom of the loaf from getting too dark. Lift the loaf by its parchment and set it in the Dutch oven. Cover and bake at 500°F for 20 minutes.⅓ cup uncooked rice
- Remove the lid, lower the oven to 450°F, and bake 10–15 minutes more, until the crust is deep golden brown.
- Take the loaf out of the Dutch oven right away and let it cool on a wire rack for about an hour before slicing.
Notes
- Use high hydration and a hard wheat. Hard white or hard red wheat with close to 90% hydration gives the best rise and a soft, open crumb.
- Autolyse with just flour and warm water. Resting them 30 minutes to an hour before adding the starter and salt softens the bran and germ.
- Shape tightly. A taut, round loaf scored with an X rises up instead of out.
- Stop the rise at 60–70%, not doubled. Fresh milled dough ferments faster and can't hold as much gas, so waiting for it to double flattens the loaf.
- Keep it warm. Use warm water and let the dough rise somewhere a little warm.
- Cold proof overnight. The chill firms up the wet dough so it holds its shape and scores cleanly.
- Bake in a very hot Dutch oven. A full preheat gives the strongest oven spring.
Tried this recipe?
Let us know how it was!Related
Looking for other recipes like this? Try these:


Discover more from Lady of the Home
Subscribe to get the latest posts sent to your email.